
“Necessity is the mother of invention”, they say.
Also known as “When you are cheap but still want to be fabulous, you often end up creating neat things.”
One recurring theme in this blog (I can already feel it, even though this is my first post) will be that I hate spending money. I am serious; I like pretty things, and I enjoy looking nice; however, the sheer idea of actually spending my hard earned money is abhorrent to me. I always feel like I have fingers for a reason, and most times, I would rather invest sweat and tears in stuff than spend on it. This will likely be the origin of most things on this blog: my refusal to spend more than I have to on anything.
Of course, this has to stop somewhere (last I checked, I can’t build an iPad), but this character trait actually helps me get a lot for very little money. It also makes me feel accomplished, resourceful, and like I “beat the system” (not always true, but whatever.)
This is a loooooong introduction to explain that, when I got engaged, I already knew I would need to be very creative to bring my vision to life (well, I did not really have a vision for my wedding- still don’t, honestly-, but I know what I like.) I cannot go over my budget, but I also knew from the start I would not settle for anything less than awesome, in any area. Therefore- it became clear pretty early in the planning process that I would have to make several things myself, or at least use creative avenues to get what I wanted.
I have been fascinated with fabric invitations ever since I first laid eyes on them, a couple years ago. There are many vendors out there who make gorgeous ones, like Alexandria Lindo, Cut Invites, and many others. However, as pretty as their offerings are, they were also WAY above my budget, no matter how creative I could get. After ordering free samples from abroad, and realizing that shipping would cost me a whopping $400, I realized that outsourcing was not the solution either. Finally, after thinking hard about all aspects and dismantling one of the samples I had ordered, I thought I would give making my own invites a shot. So I did. And it worked.
Let me warn you: this is NOT for the faint of heart. I started my invitations in April (roughly 200 of them), and I did not put them in the mail until July. Granted (at the exception of one weekend), I mostly did them alone because most of my bridesmaids live out of state, and I worked on them on weekends only because of work. The tutorials I followed were also incomplete for my taste, and I had to borrow bits and pieces from several ones – as well as create some custom steps to make sense of it all.
Enough yapping, let’s get started.
Tutorials that were a tremendous help, and that I will be quoting during the process:
Femi and Tide’s Folios (<- the one I got the most information from), MsDivaCrafty’s folio tutorials
Materials Needed:

- Comic Book boards; I used these ones from Amazon, and also ordered some pre-cut ones from E.Gerber. I used the regular ones, but I suggest the double thickness ones (the ones I got were flimsy compared to the Amazon ones, but then- I didn’t have to cut them so score!).
- Masking tape; get it wider than 1 inch if you can
- Felt fabric that I got from Joann’s Fabrics ; any cushiony fabric would likely work here. (optional)
- 1 1/2in ribbon in desired color (this is the one I used)
- 5/8 in ribbon in desired color (mine was from Joann’s Fabrics)
- Desired fabric (I first looked at silk, and satin, but they were waaaay too fussy so I went for a rich wine velvet that I bought from the Fabric Exchange on Amazon.)
- Mod Podge decoupage tool, that I also got from Amazon
- Card stock in desired color; I got mine from Amazon, and then from Paper and More because it was much cheaper
- Actual wedding cards and inserts (mine were made from this paper, from Paper and More). I printed them from Kinko’s.
- Buckles (there is a ton on Ali Express, and they go by “pair buckles”). I got mine from here. My man Jessie hooked me up.
- Boxes to ship the invitations in. The ones I got are here, but I honestly feel like you can do better than those.
- Glue. Oh my goodness so many types of glue, but they all serve a different purpose.
- Spray on Glue, from Joanne’s Fabrics, to adhere the felt to the book backing boards
- Mod Podge Fabric Glue to adhere the velvet to the comic book boards
- Hot glue sticks and a mini glue gun from Joanne’s Fabrics to adhere the card stock to the velvet, and a ton of other uses
- E700 to glue the buckles to the folios
On top of that, I bought some tools I needed:
- Fabric scissors
- A rotary cutter
- (Long) Ruler
- Paint brushes
- Self healing cutting mat from Joanne’s Fabrics to work with all those things.
Okay, I think that is it. See what I mean when I say it is not for the faint of heart?
I also suggest working in batches. As in, build all the folio skeletons, cut all the fabric, glue all the fabric, etc. Trying to do the folios completely one by one will not allow you to climb the learning curve (you become better at one activity by doing it repeatedly, so work on one thing until it’s done before moving on to something else.)
Step 1: Cut the book boards and the card stock to size.
Your folios have 1 back and 2 flaps. The flaps are half the size of the back (same height, half of the width). So for each folio, you will have to have 3 pieces. In my case, I followed Tide and Femi’s example and had 6inx8in for the backs, and 6inx4in for the flaps. I would not recommend that size, because it does not fit neatly in any envelope on Earth (if you find one, please link it below), so you invariably find yourself having to mail them in a box- which is cute and all, but expensive as crap.
So, head to your local Kinkos, or borrow a paper cutter somewhere (I do not recommend scissors, unless you are positive you can cut straight- I can’t), and cut those bad boys to the size you want. I just cut all of them to the 6inx8in size, then took half of them and cut them down the middle = flaps done. This is where the E. Gerber boards come in handy, because you can order them pre-cut and skip right over this boring step.
Do the same for the card stock that go inside the folios, same size as the boards.
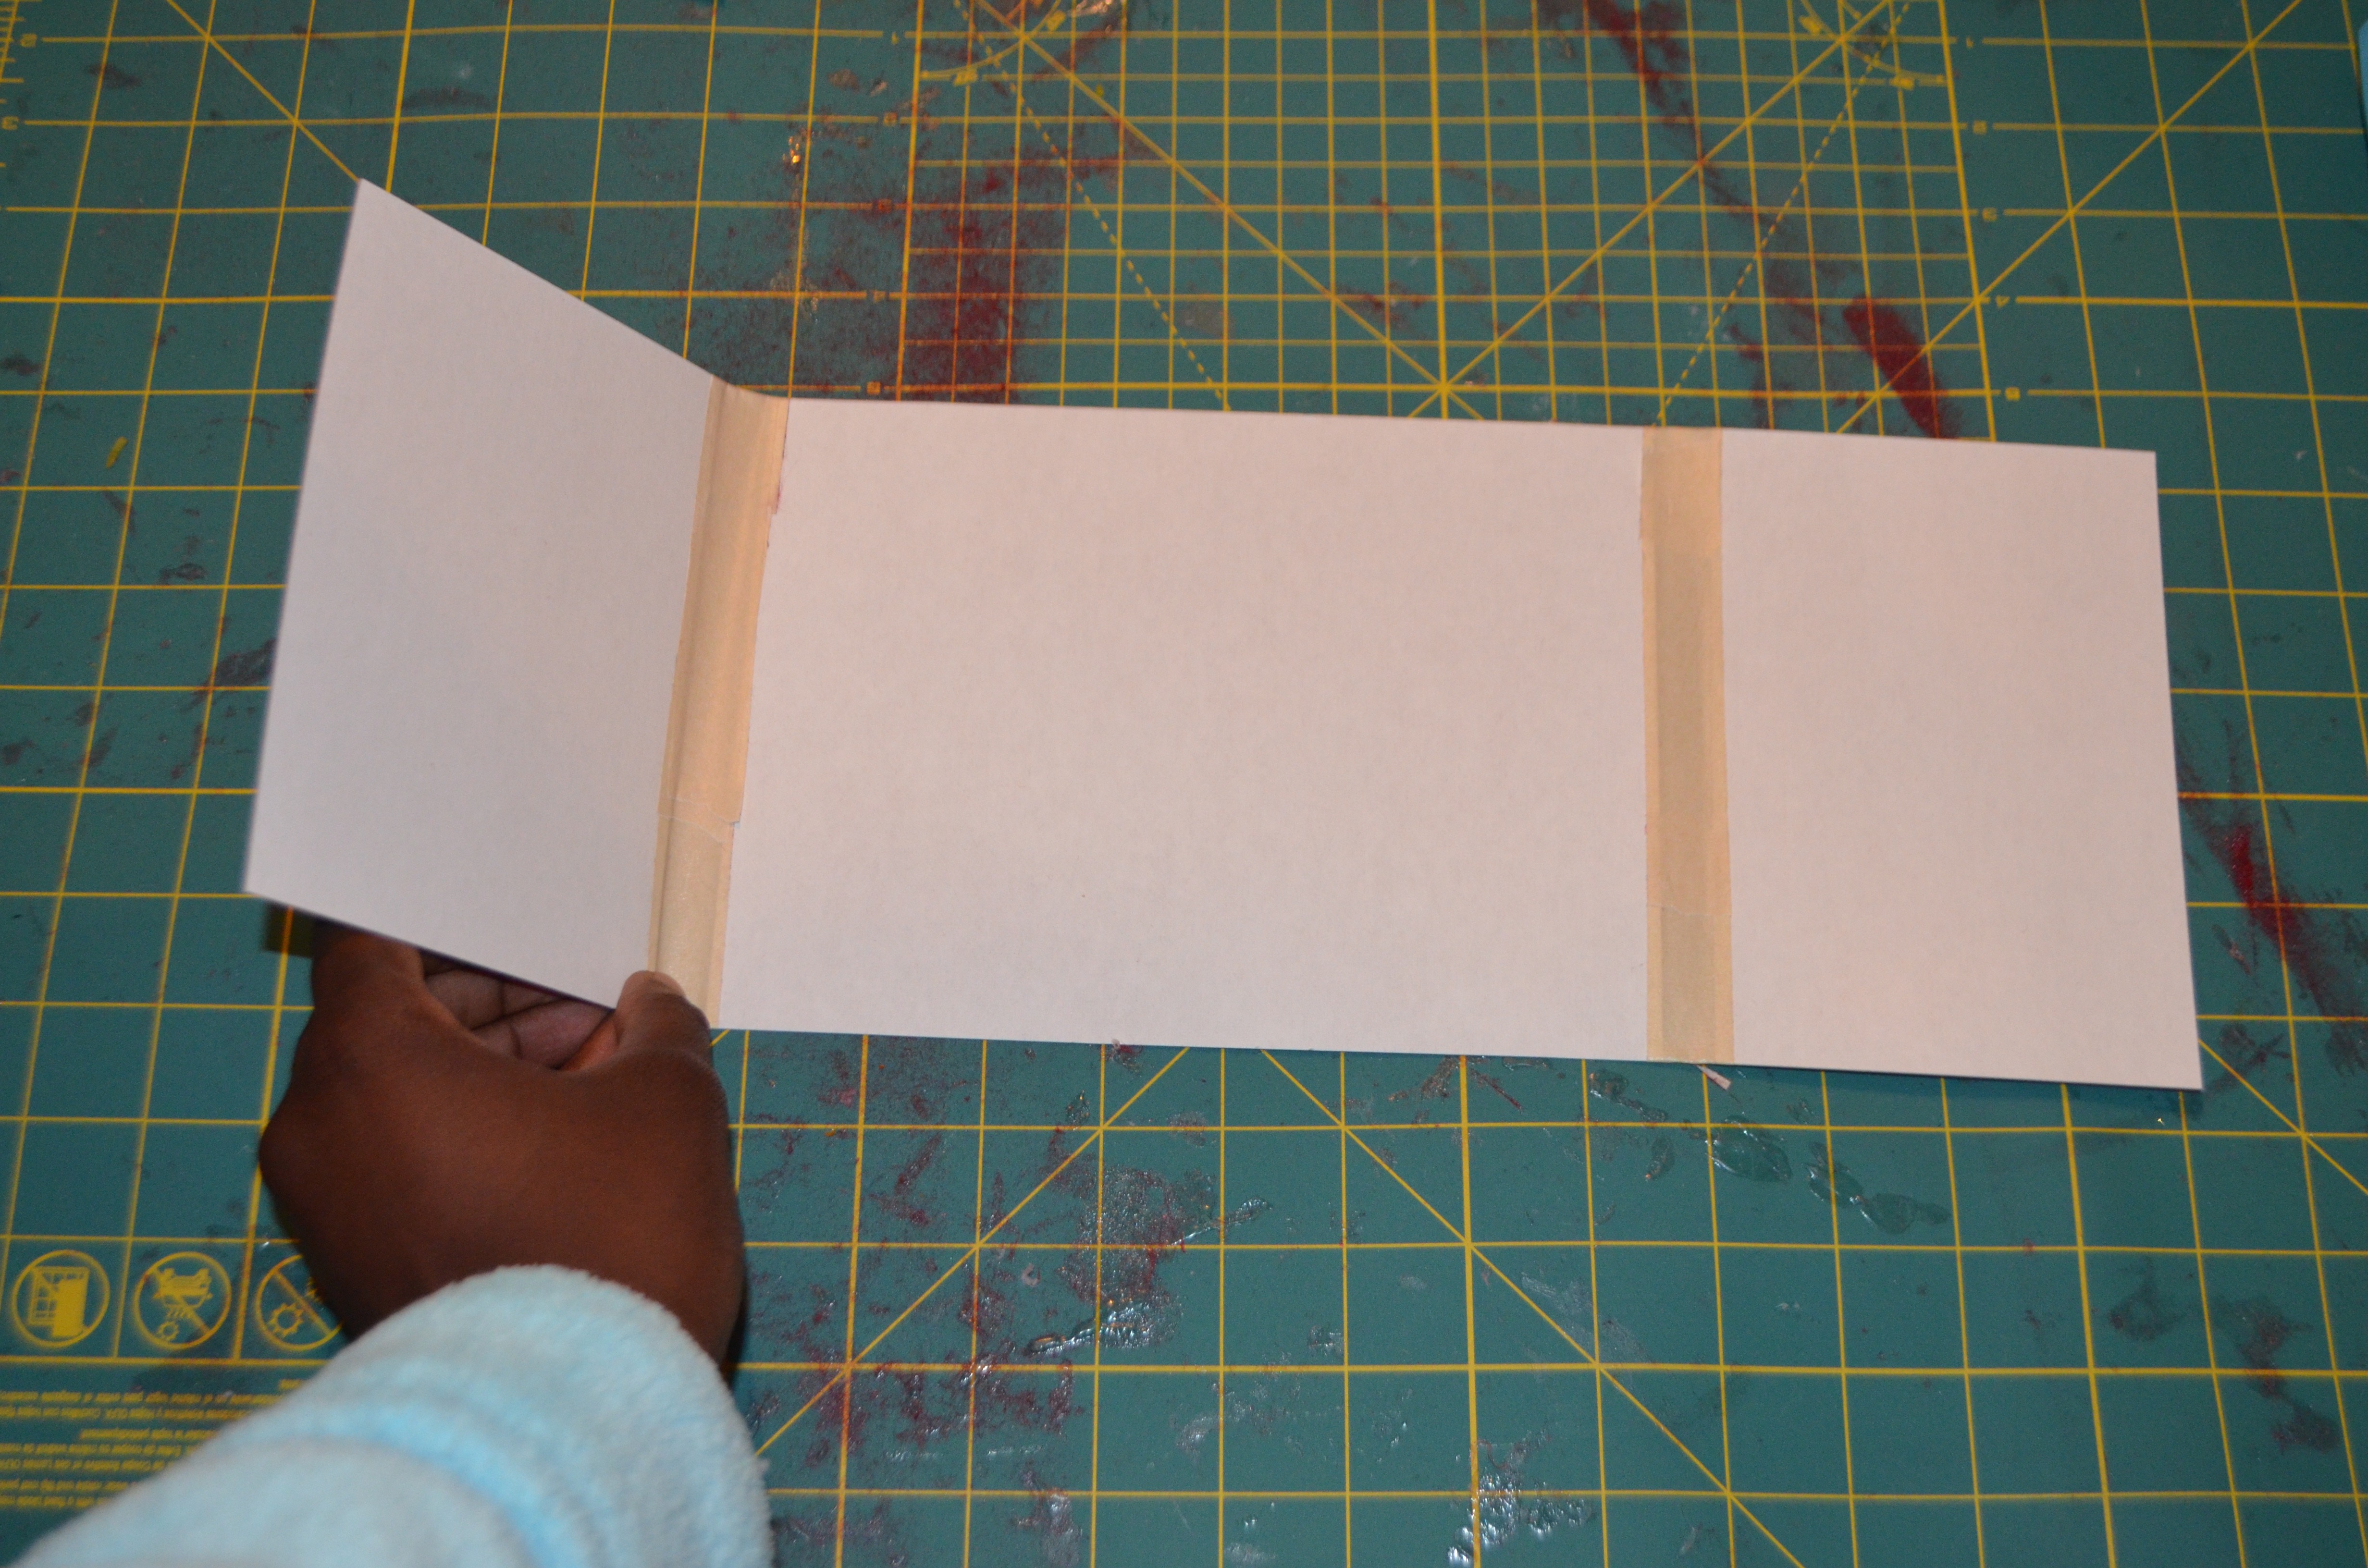
Step 2: Build the skeleton of the folio.
Build the skeleton by taping the back and the flaps, while leaving a gap between them in the tape to form the spines. MsDivaCrafty explains it well here, at 1:49 in her folio video. In our case, since we have 2 flaps, each folio will have 2 spines.
Here is how I did mine:

Step 3: Cut the felt fabric to size.
Here, the felt (top left in the first picture) is used to go on the skeletons below the fabric, to give a plusher and more luxurious feel. It is optional, but I liked using it because it gave a professional feel to my folios by making them very nice to the touch. I believe MsDivaCrafty did it in one of her videos.
The skeletons are therefore 4+8+4 = 16in in width and 6 inches in height. Adding the extra space for the spine, I would say they are around 18inx6in. I cut my felt fabric roughly to that size (better to go have them be a bit larger- you can always trim them down with the rotary cutter, or scissors.)
Step 4: Glue the felt to the back of the folios, and let dry.
I used spray glue for this one, because there is no need to be super accurate- the felt goes under the velvet anyway. Also, spray glue is easy to apply, dries fast and is very strong. It is easy to spray the taped boards with it and quickly adhere the felt to them. However, it stinks so I suggest using it in a well ventilated area. After that step, I just took the folios outside to dry while I worked on the next step (the most annoying of all).


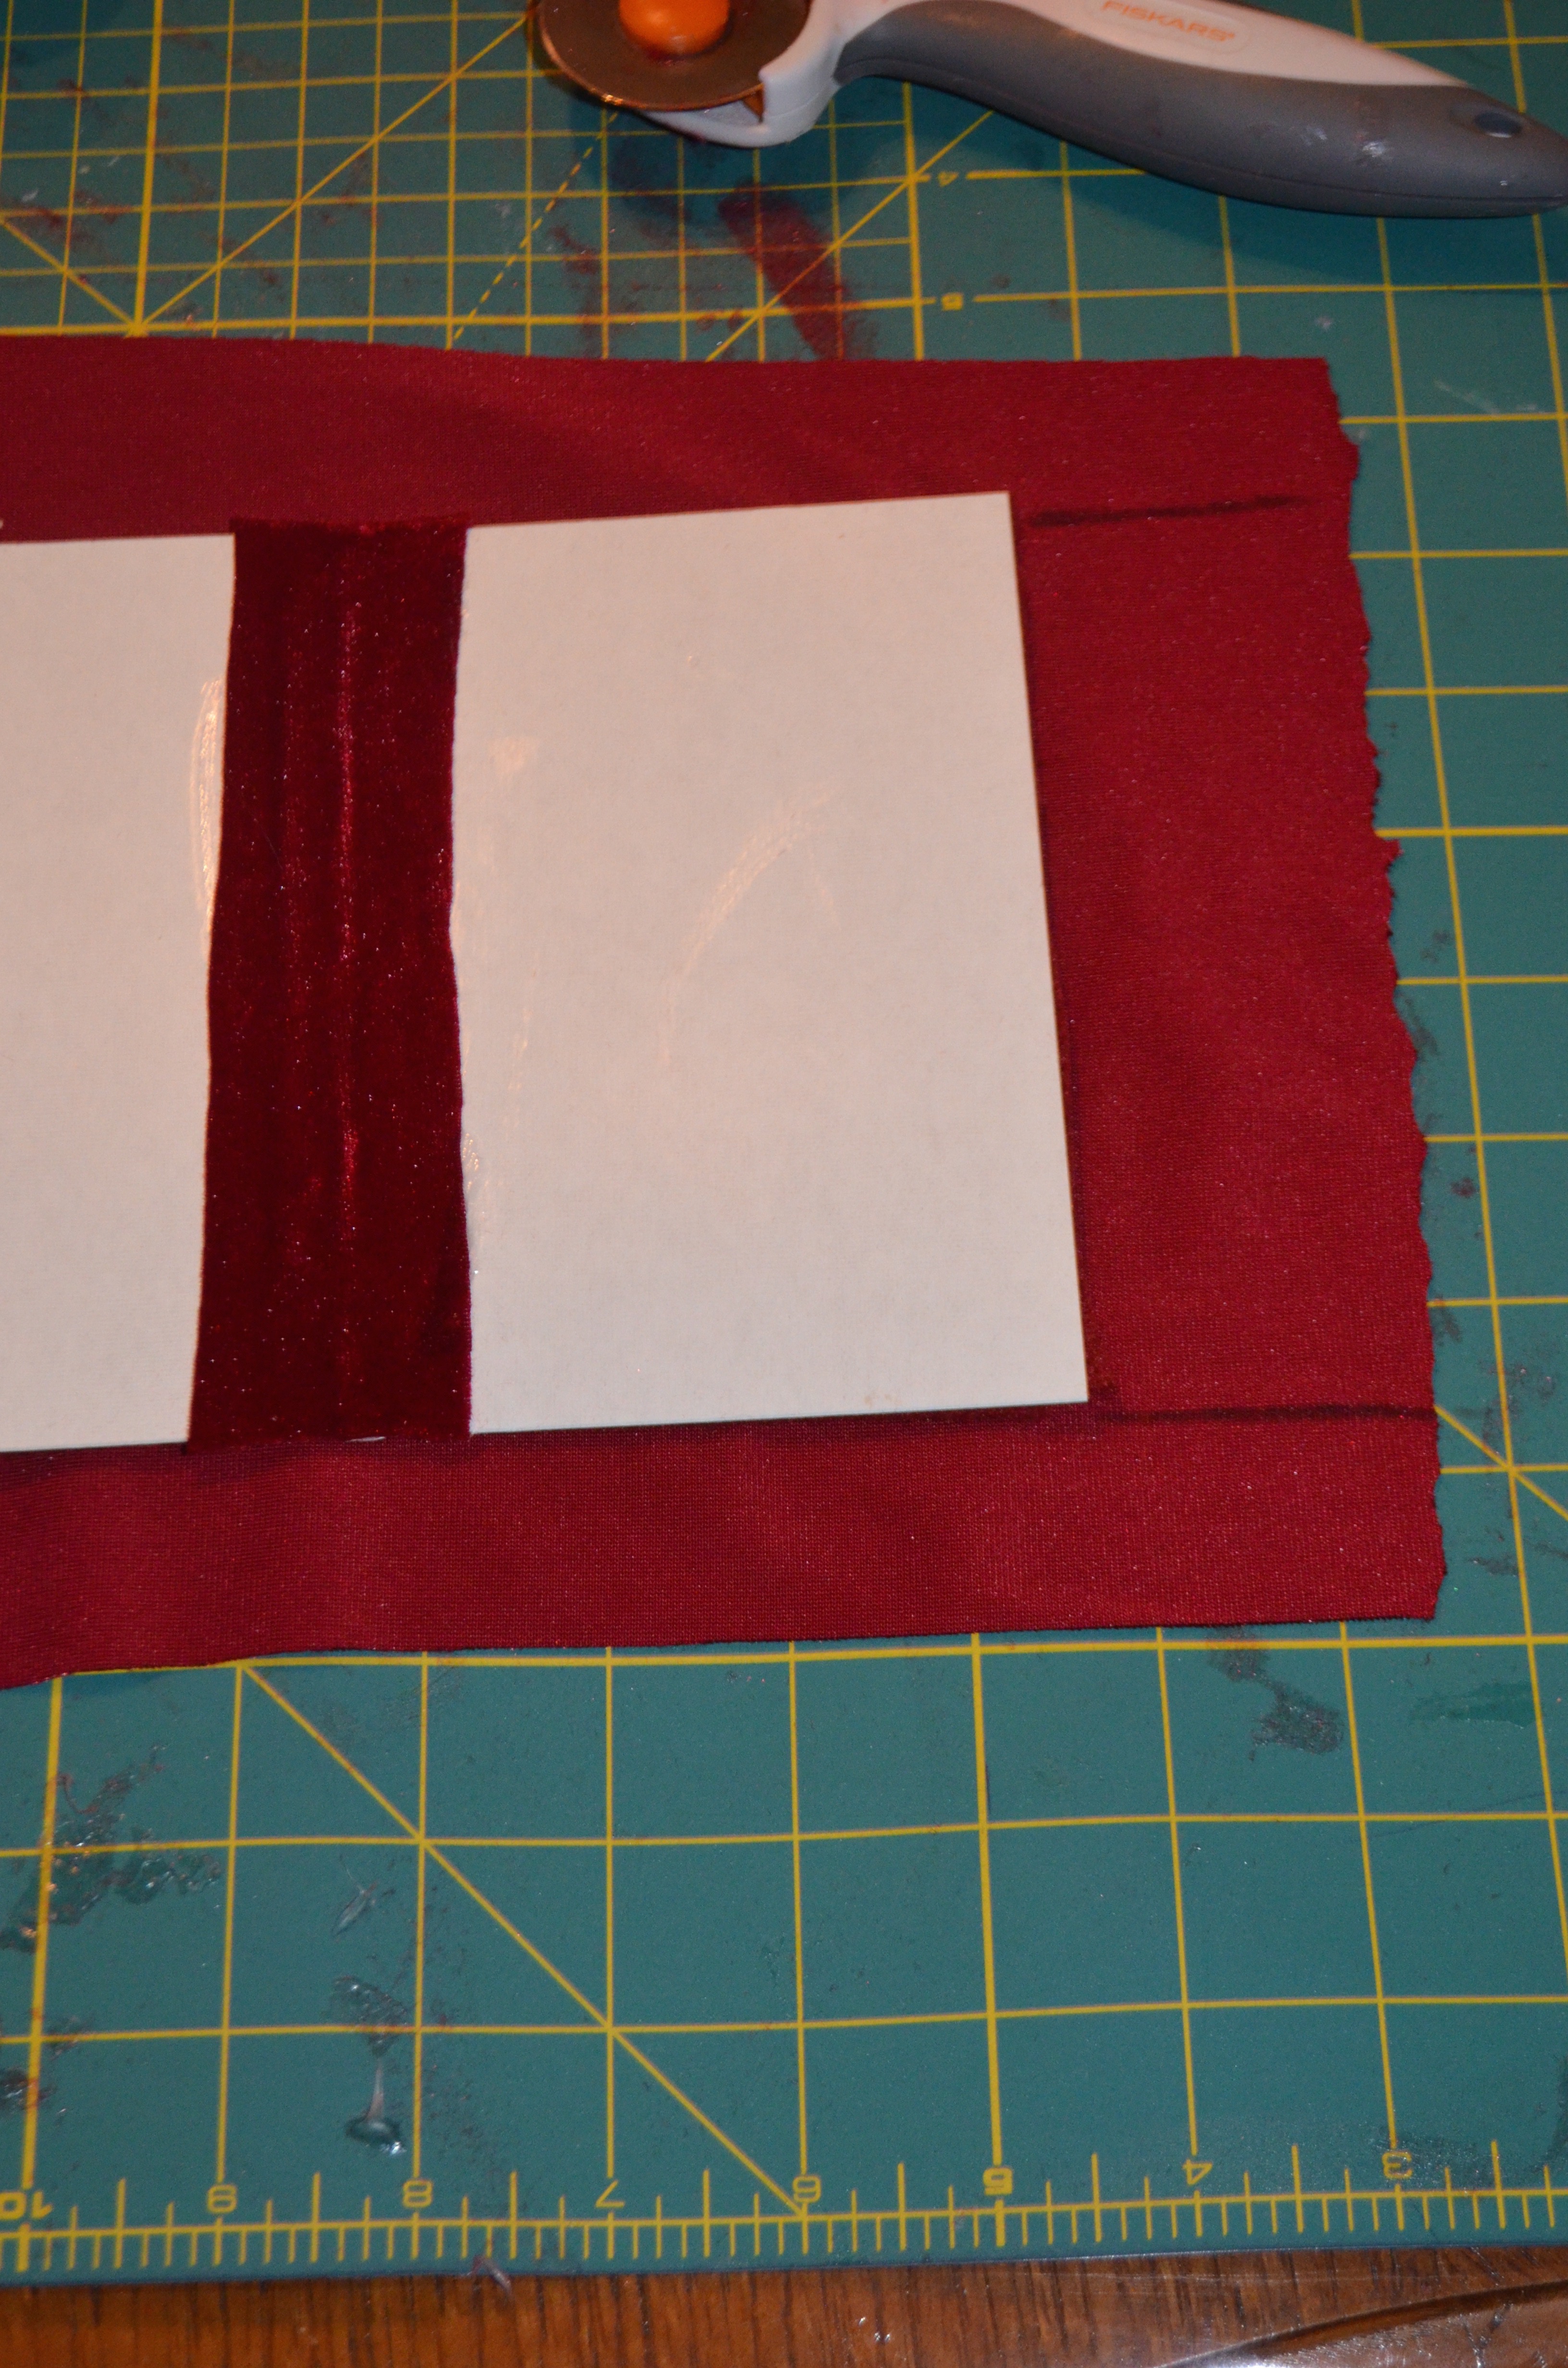
Step 5: Cutting the velvet (or whatever fabric you are using) to size.
Just like the step above, but the velvet has to be cut even larger because it gets folded back inside the folios and glued that way (you will see a few steps below). Also, 2 different types of cuts of velvet are needed: the pieces actually going on the folio, and smaller strips to be used to cover the masking tape inside.
I made the velvet pieces roughly 22inx10in (I added 2 inches left, right, top and bottom) and made the strips 1.5inx10. The strips can be trimmed later.
Step 6: Applying the fabric strips.
I left my folios dry overnight. The next day, I used a small paint brush to apply Mod Podge fabric glue to the spines of the folios inside (the opposite side to the felt, naturally.) I then glued the velvet strips I mentioned above to the spines, so the inside of the folio would be completely covered in fabric when done, with no tape in sight.
After applying the fabric, I used the roller from the decoupage set to get rid of any air bubbles under the fabric to make it flawless. I then cut off the excess. Tide explains it very well in her tutorial, and see below for a quick gif.


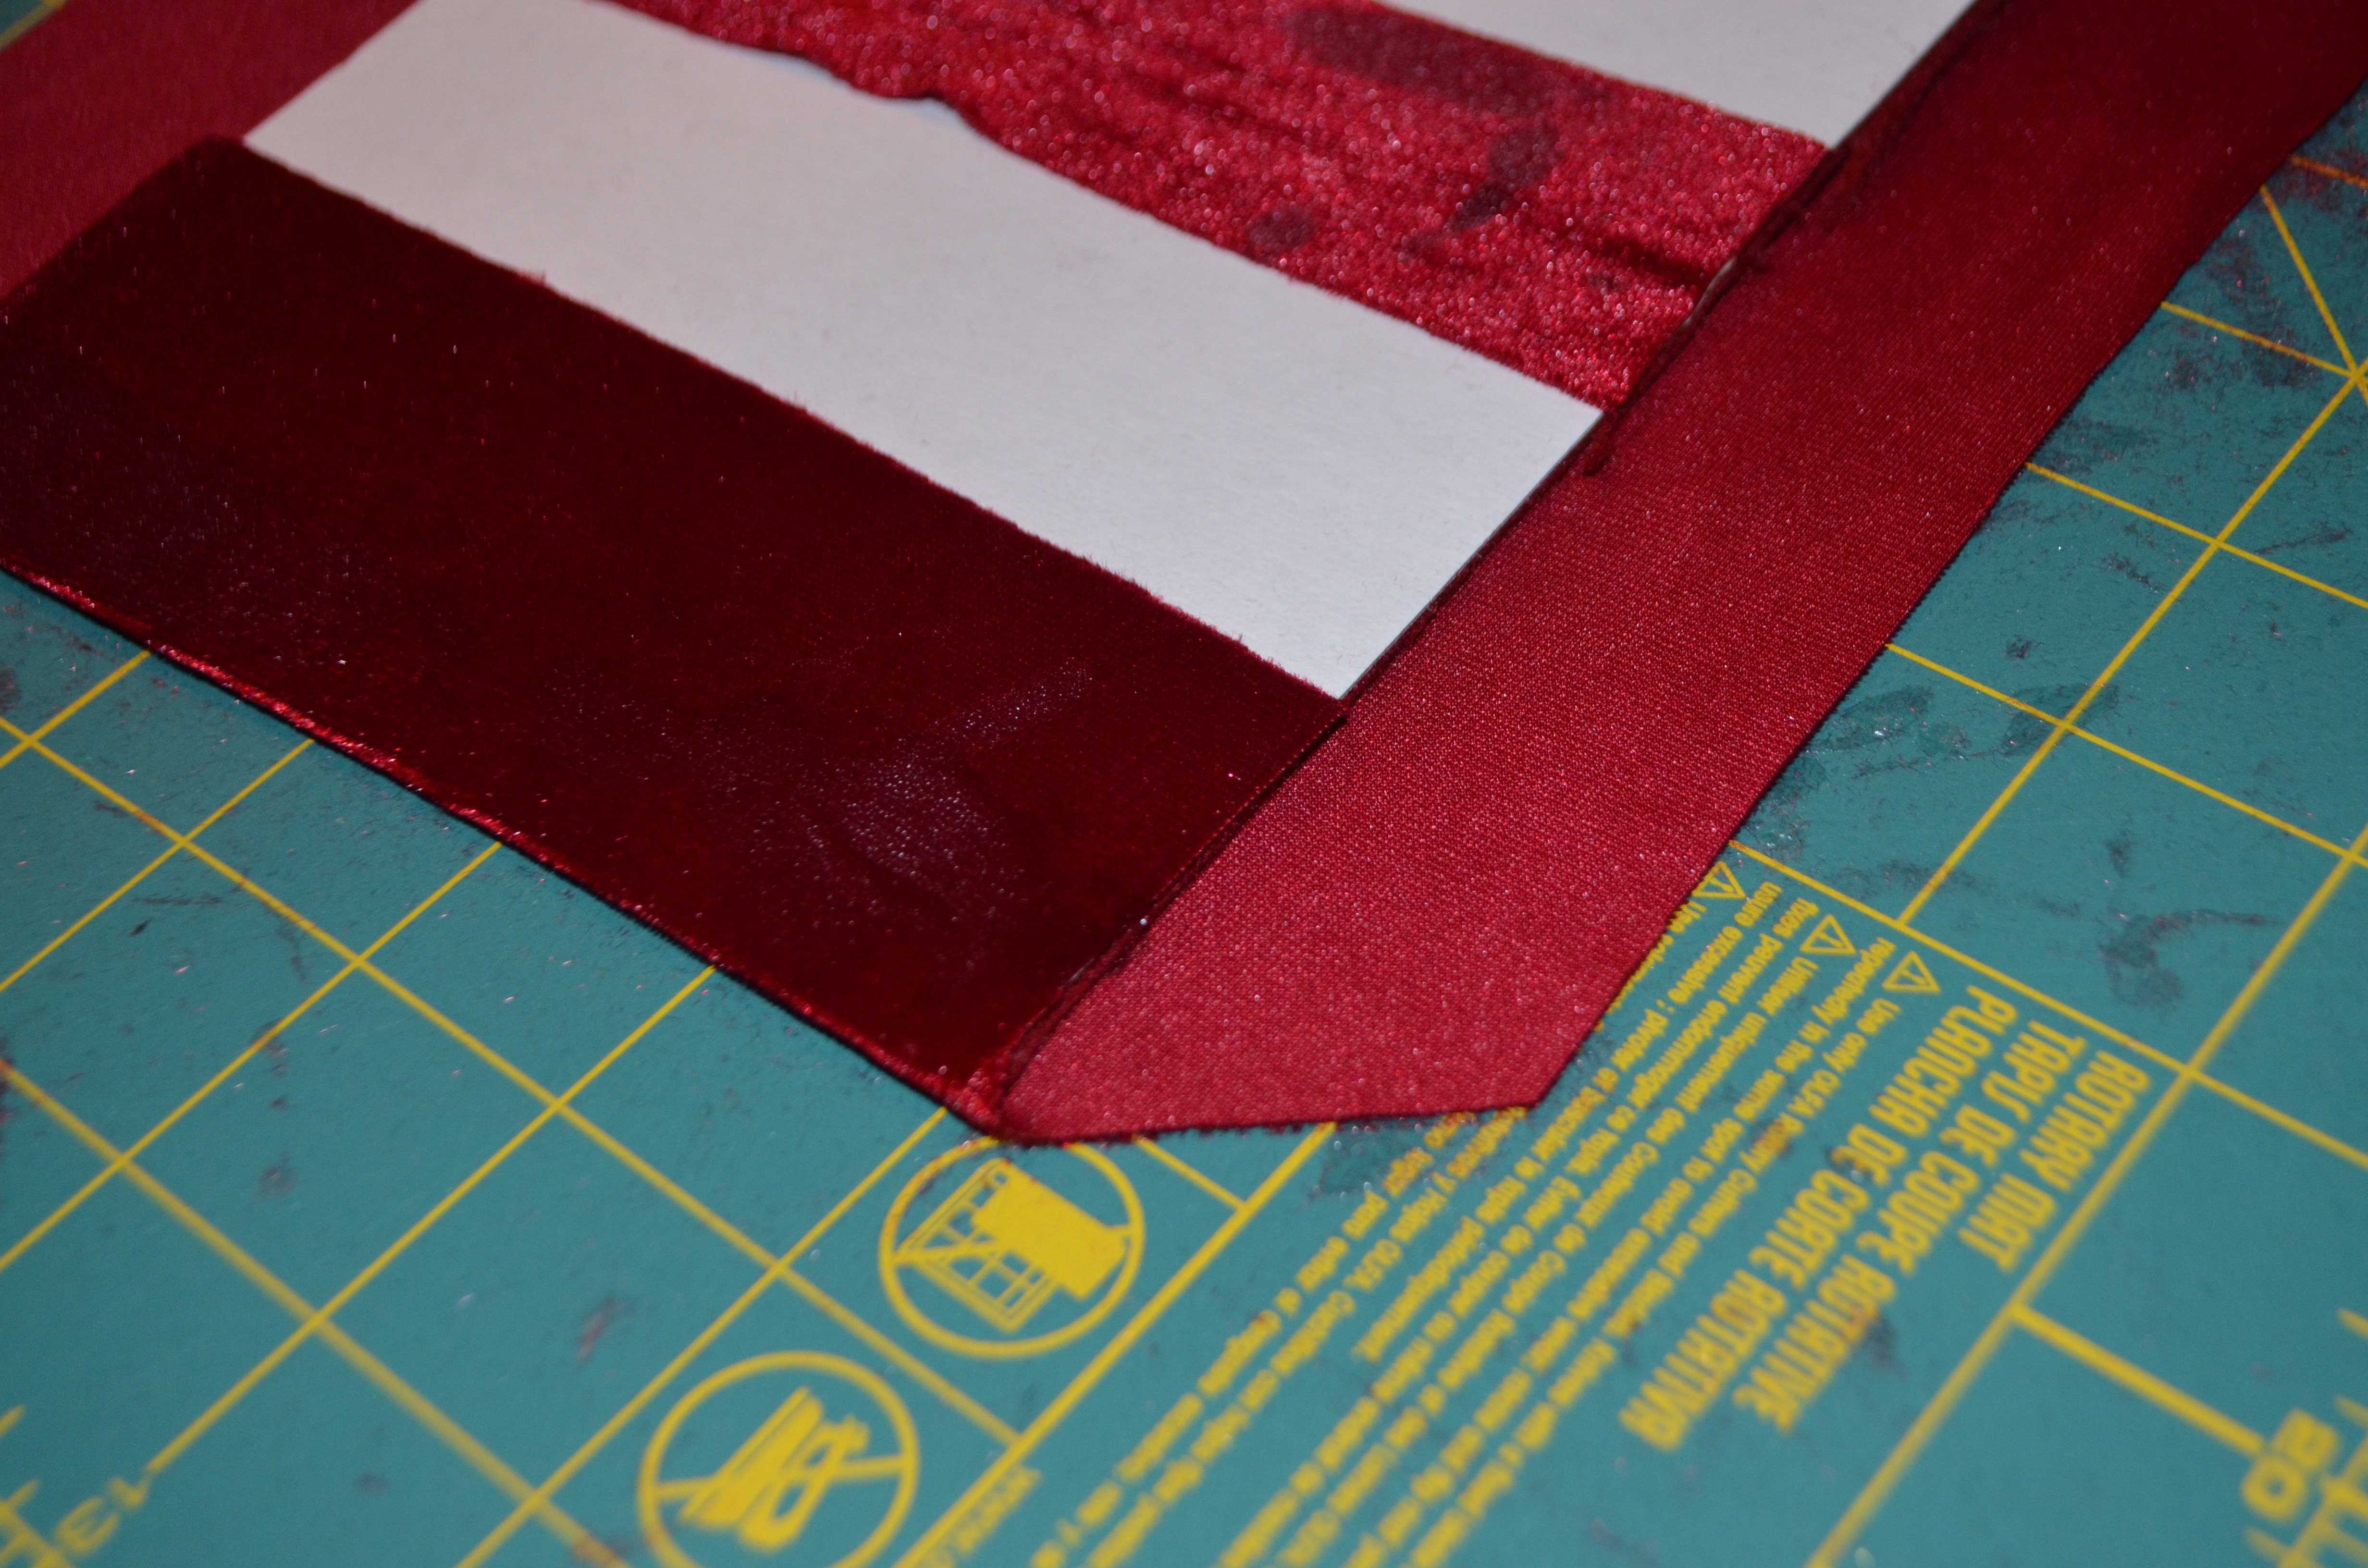
Step 7: Applying the fabric overlay.
I lied; this is the most annoying step. Honestly- practice makes perfect for this one, sorry. The reason I loved velvet is because it is much more forgiving than satin at this stage (I made a few test runs with satin before deciding against it.) The hardest part is to make sure to apply the fabric in a way that the corners have no gaps, and look very neat. Also, it has to be taut enough to look nice, but not so tight that the folio will not close. Here is how I did it:
- Cut off the excess fabric from the the strips applied in the previous step, as well as the excess felt fabric if you haven’t done it already. That should give you a neat canvas.
- Put the skeleton on top of a pre-cut piece of fabric, making sure to put the right part of the fabric away from the folio (put the folio on the wrong side of the fabric.
- Grab your rotary cutter (or scissors, if you do not have one), and make two horizontal slits on the right side of the folio, from the edge of the skeleton to the end of the fabric. Repeat on the other side. This will allow you to fold the edges of the fabric easily.
- Grab a brush and apply some Mod Podge fabric glue to the inside of the folios, in a roughly 2 inch width.
- Fold over the fabric and glue to the skeleton. Make sure the fabric is nicely taut, but not so tight that you can’t close the skeleton.
- Almost there! Now you should have the top and the bottom of the folio do to next. Using your rotary cutter, cut diagonal edges on all four corners of the fabric. Make sure not to cut too much fabric- line it up with the skeleton.
- At that point, you should have the corner pretty much ready to go. Apply Mod Podge to a brush and repeat the step above, only for the top and bottom edges. Fold the fabric over carefully, making sure the corners are well covered. Pull tight to have a neat finish on said corners.
- I personally followed with an extra dab of hot glue in the corners, and also where the outside fabric met the inside strips to make sure everything was nice and tight, and that no fabric would come undone.
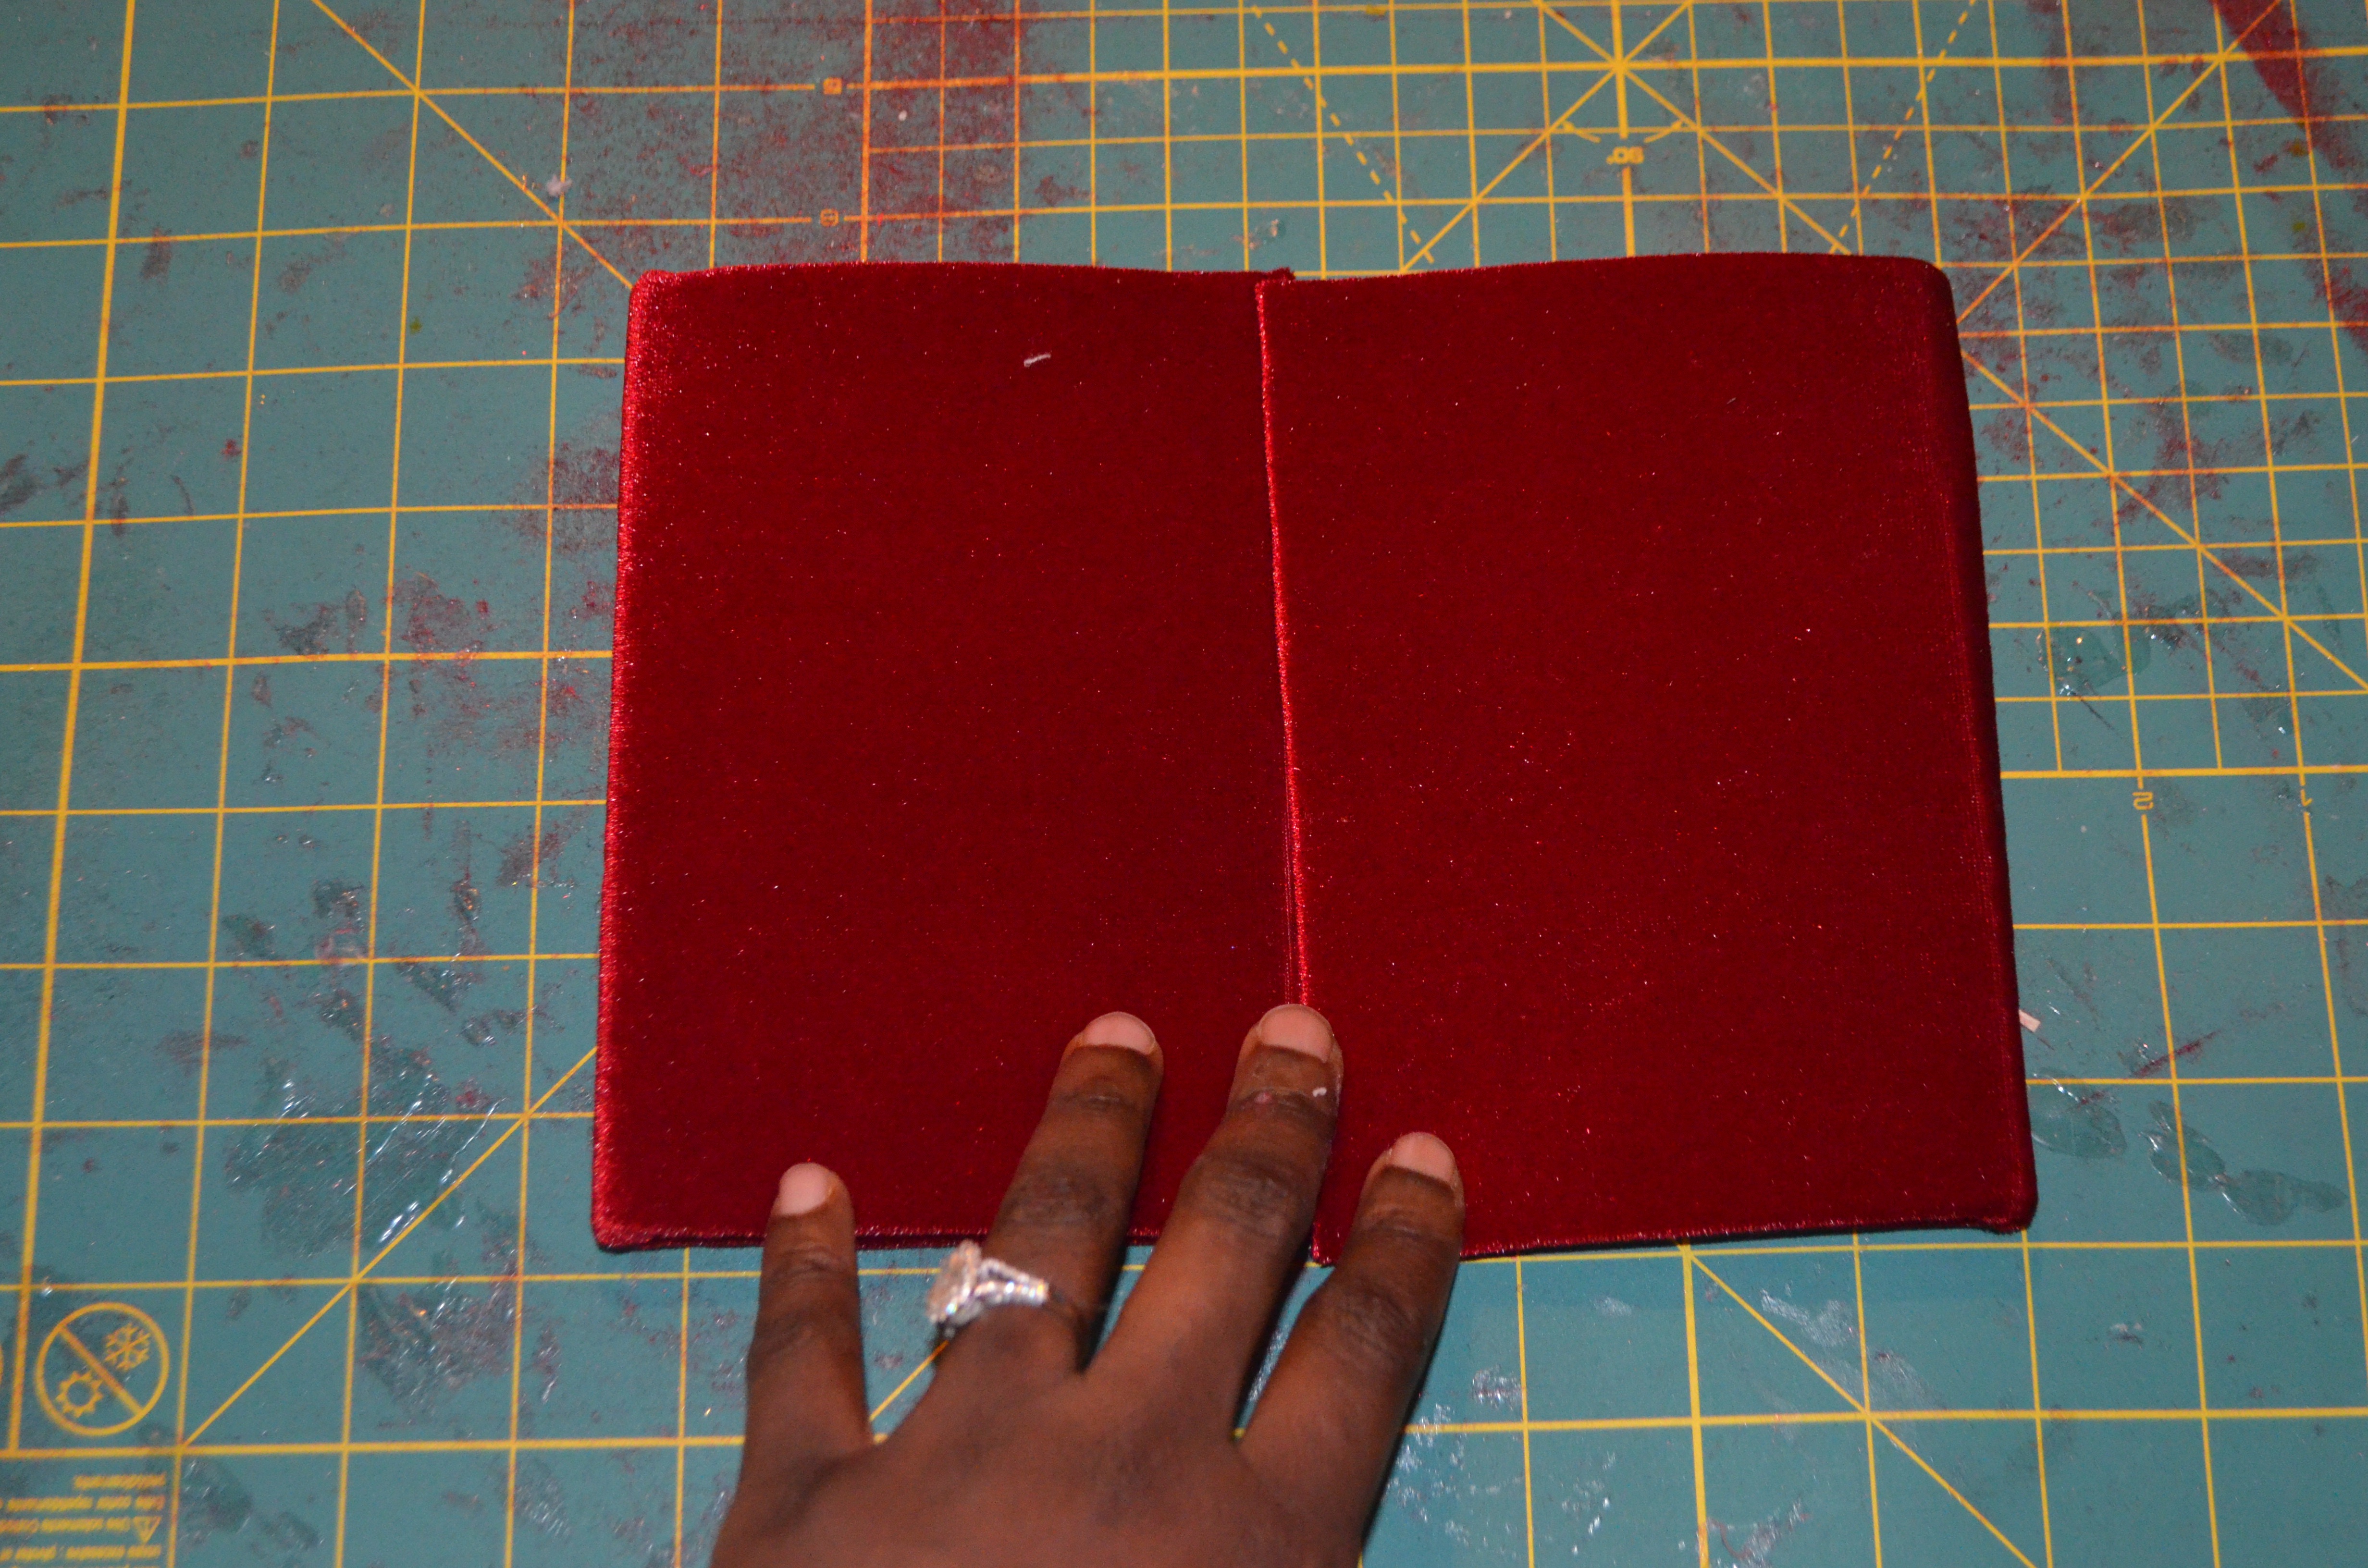
- See, your folio is coming together! Yay!
- Let dry.
- Grab a glass of wine, a beer, juice, or whatever you like. Gotta celebrate.


Step 8: Make sure your folio closes and looks good.
No hanging fabric, no ragged edges, no glue on top of the fabric outside, etc.

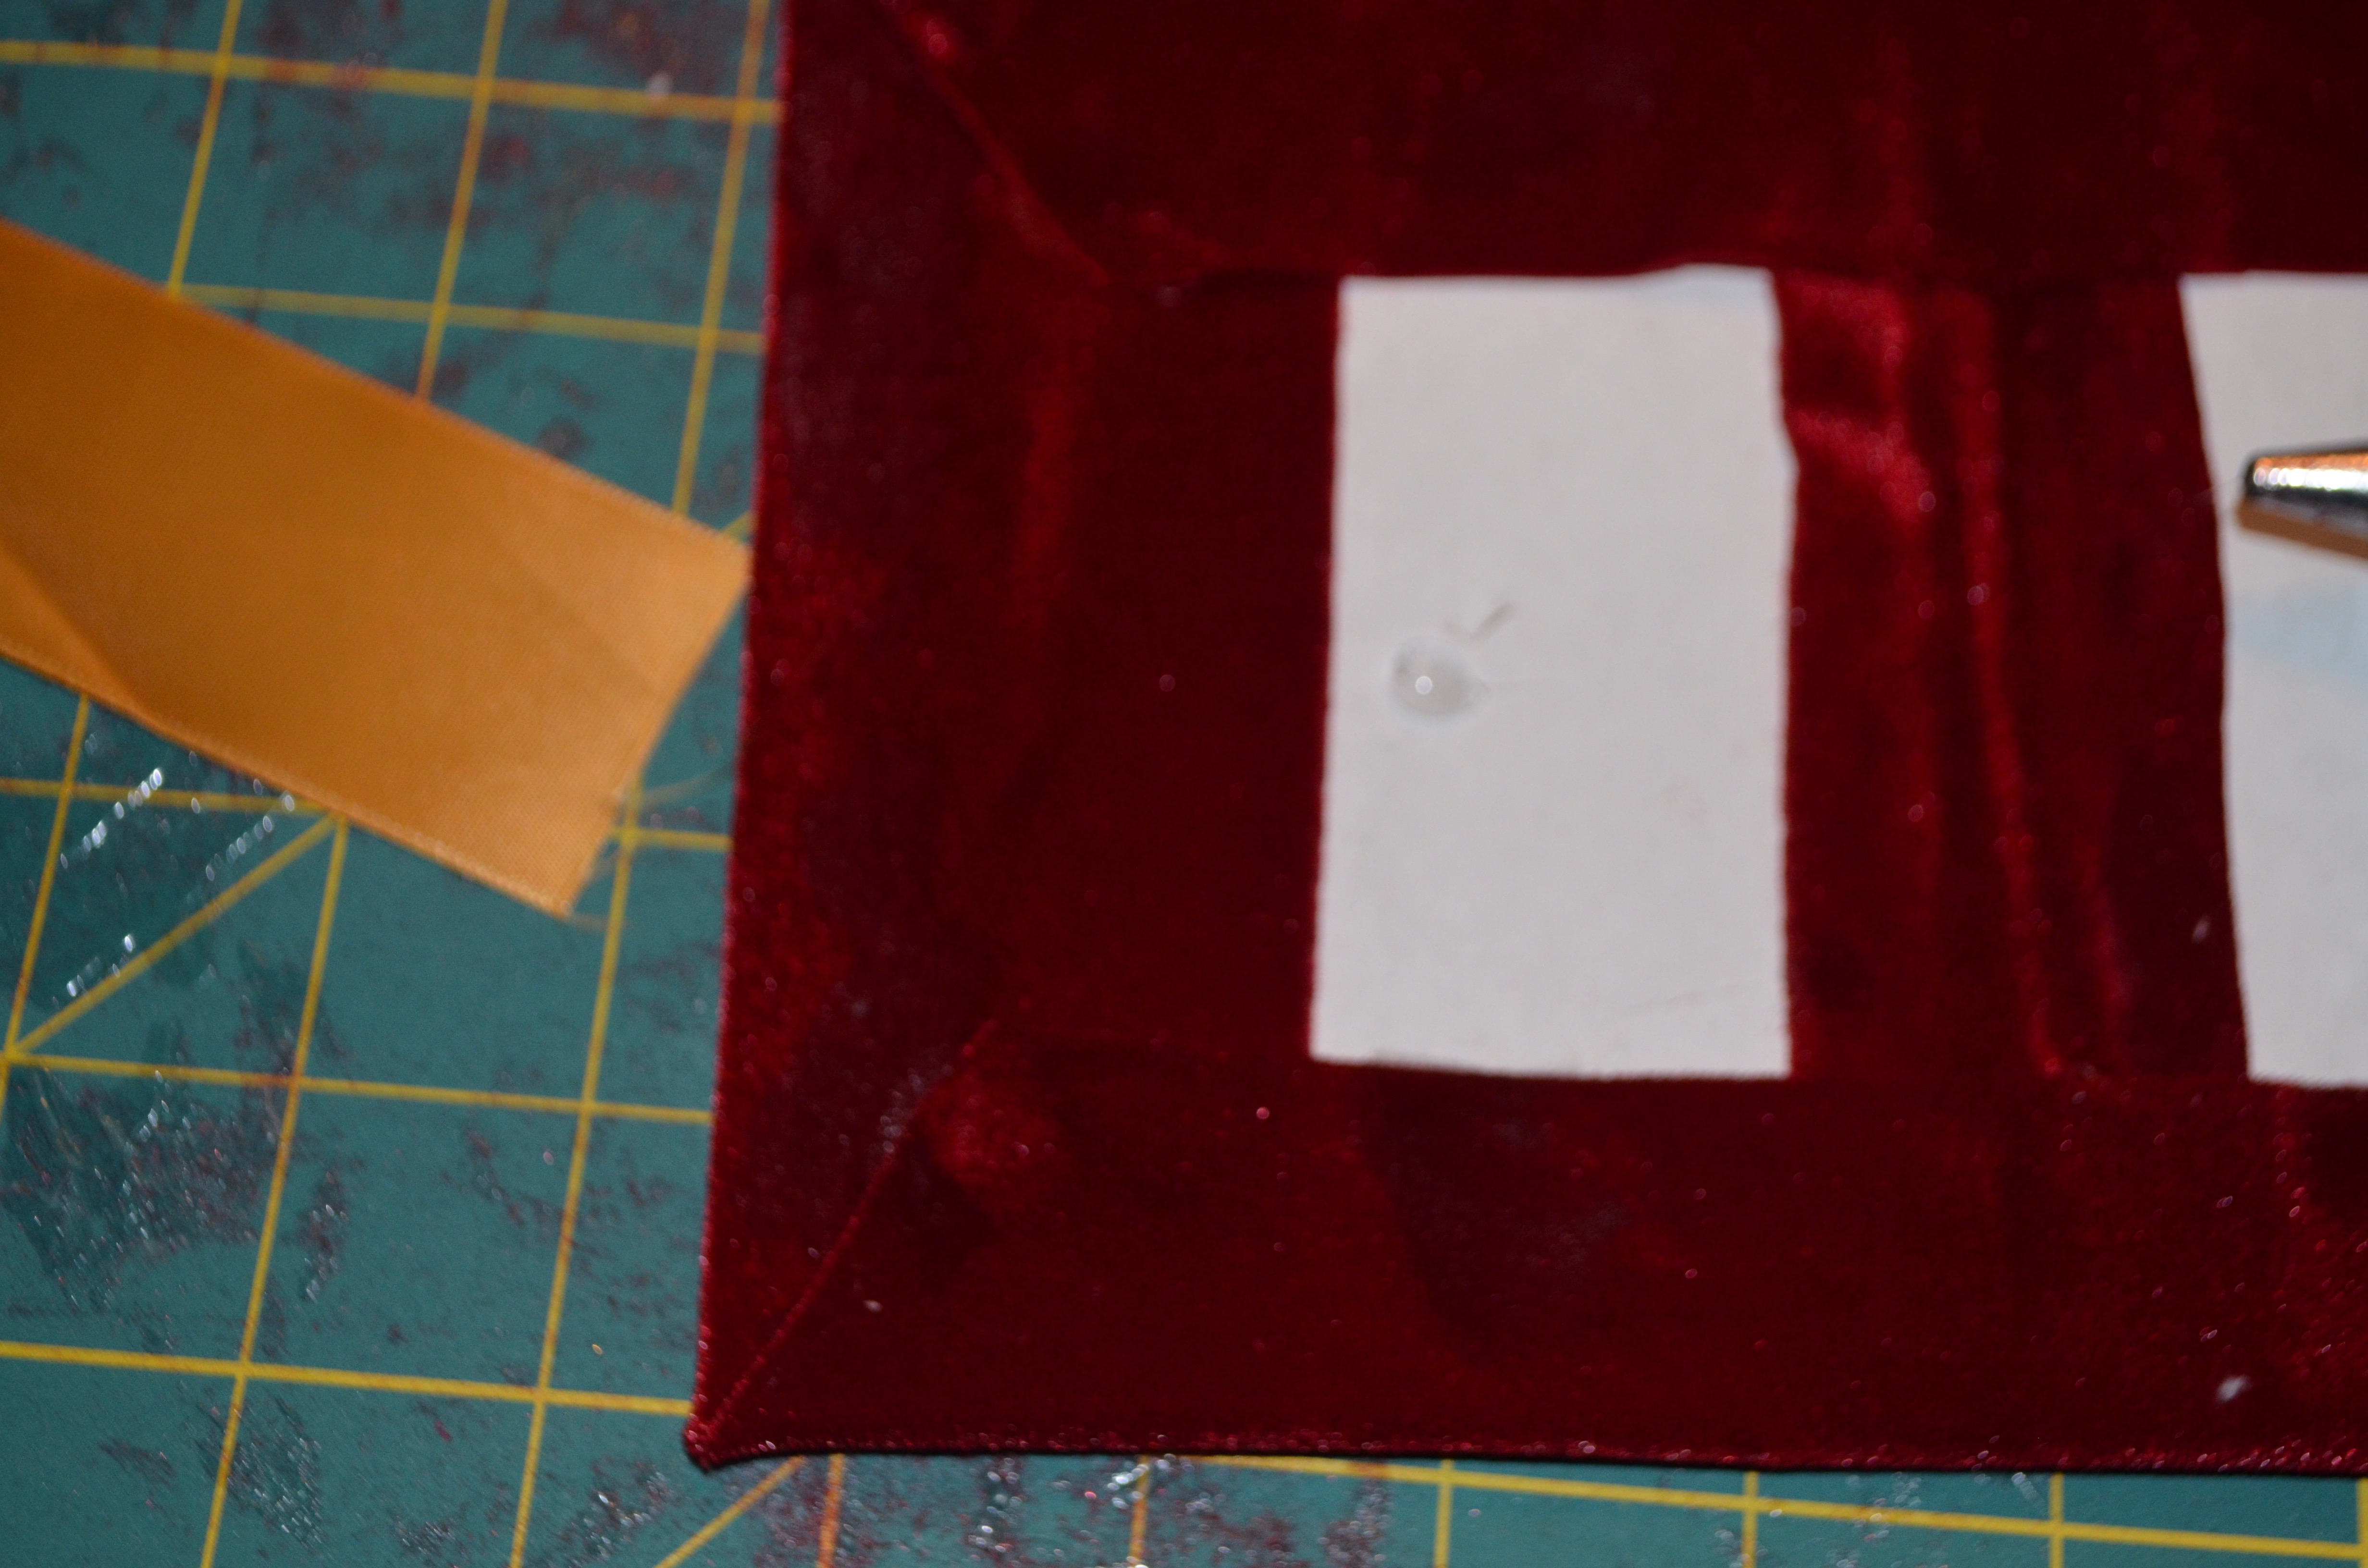
Step 9: Apply your ribbon.
Here is another tricky one. To apply the ribbon, use a dab of hot glue in the middle of one flap, near the velvet. Make sure the ribbon is secure; close the folio, and run the ribbon all around the outside of it (flap 1, back and flap 2) until you get to the the end of flap 2. Then, open the folio and glue the ribbon in the center of flap 2, BUT NOT BEFORE MAKING SURE THAT THE RIBBONS MATCH UP ON THE OUTSIDE (same height). I promise you, they tend to magically get screwed up, and it is the most frustrating thing when you realize it after you are done with the whole folio- no way to put the buckles on them.
Right before gluing the ribbon is also a good time to measure the optimal length necessary and cut several pieces of the same length for coming folios (work in batches, remember?)

Step 10: Prepare where your inserts will go.
Grab the card stock you pre-cut for the flaps in Step 1. Separate it in 2 piles; some will go left and the others right.
Using a glue gun, secure ribbon diagonally on the cards, going through the middle of the bottom edge and the middle of the left or right edge (depending on the side), by gluing the edges of the ribbon to the back of the card stock with a dab of glue each . Make sure the ribbon is nice and taut, and that it is well adhered on the back of the card. That ribbon will hold any inserts you want to send with your invitations.
Again- measure the ribbon used, and cut several pieces of the same length to use for all card stock pieces. Batches!


Step 11: Glue your card stock inside the folio.
Grab your pre-cut 6inx8in card stock, as well as the flaps we just worked on, and glue them to the inside of the folios. Make sure to glue the card stock for the flaps right at the edge of the folio, so they do not end up on the spine, which would cause them to fold when the folio closes. Not in a pretty way may I add…
By now, you are almost done. Your folios are almost ready, and you can see the light at the end of the tunnel! Yay!
You may take another wine break. Or just go take a nap.


Step 12: Glue the actual wedding card to the back of the folio.
Pretty self explanatory.
I used the glue gun for this step as well, and made sure my invitations were very well centered. They were 5inx7in, so they were 1/2 in from each edge. If you use hot glue here as well, work fast. It dries quickly, and becomes useless when it gets cold and the card is not already adhered; it will cause unsightly bumps, because it dries hard. This is a step where flawlessness is necessary, because your addressees will actually pay attention to the card.

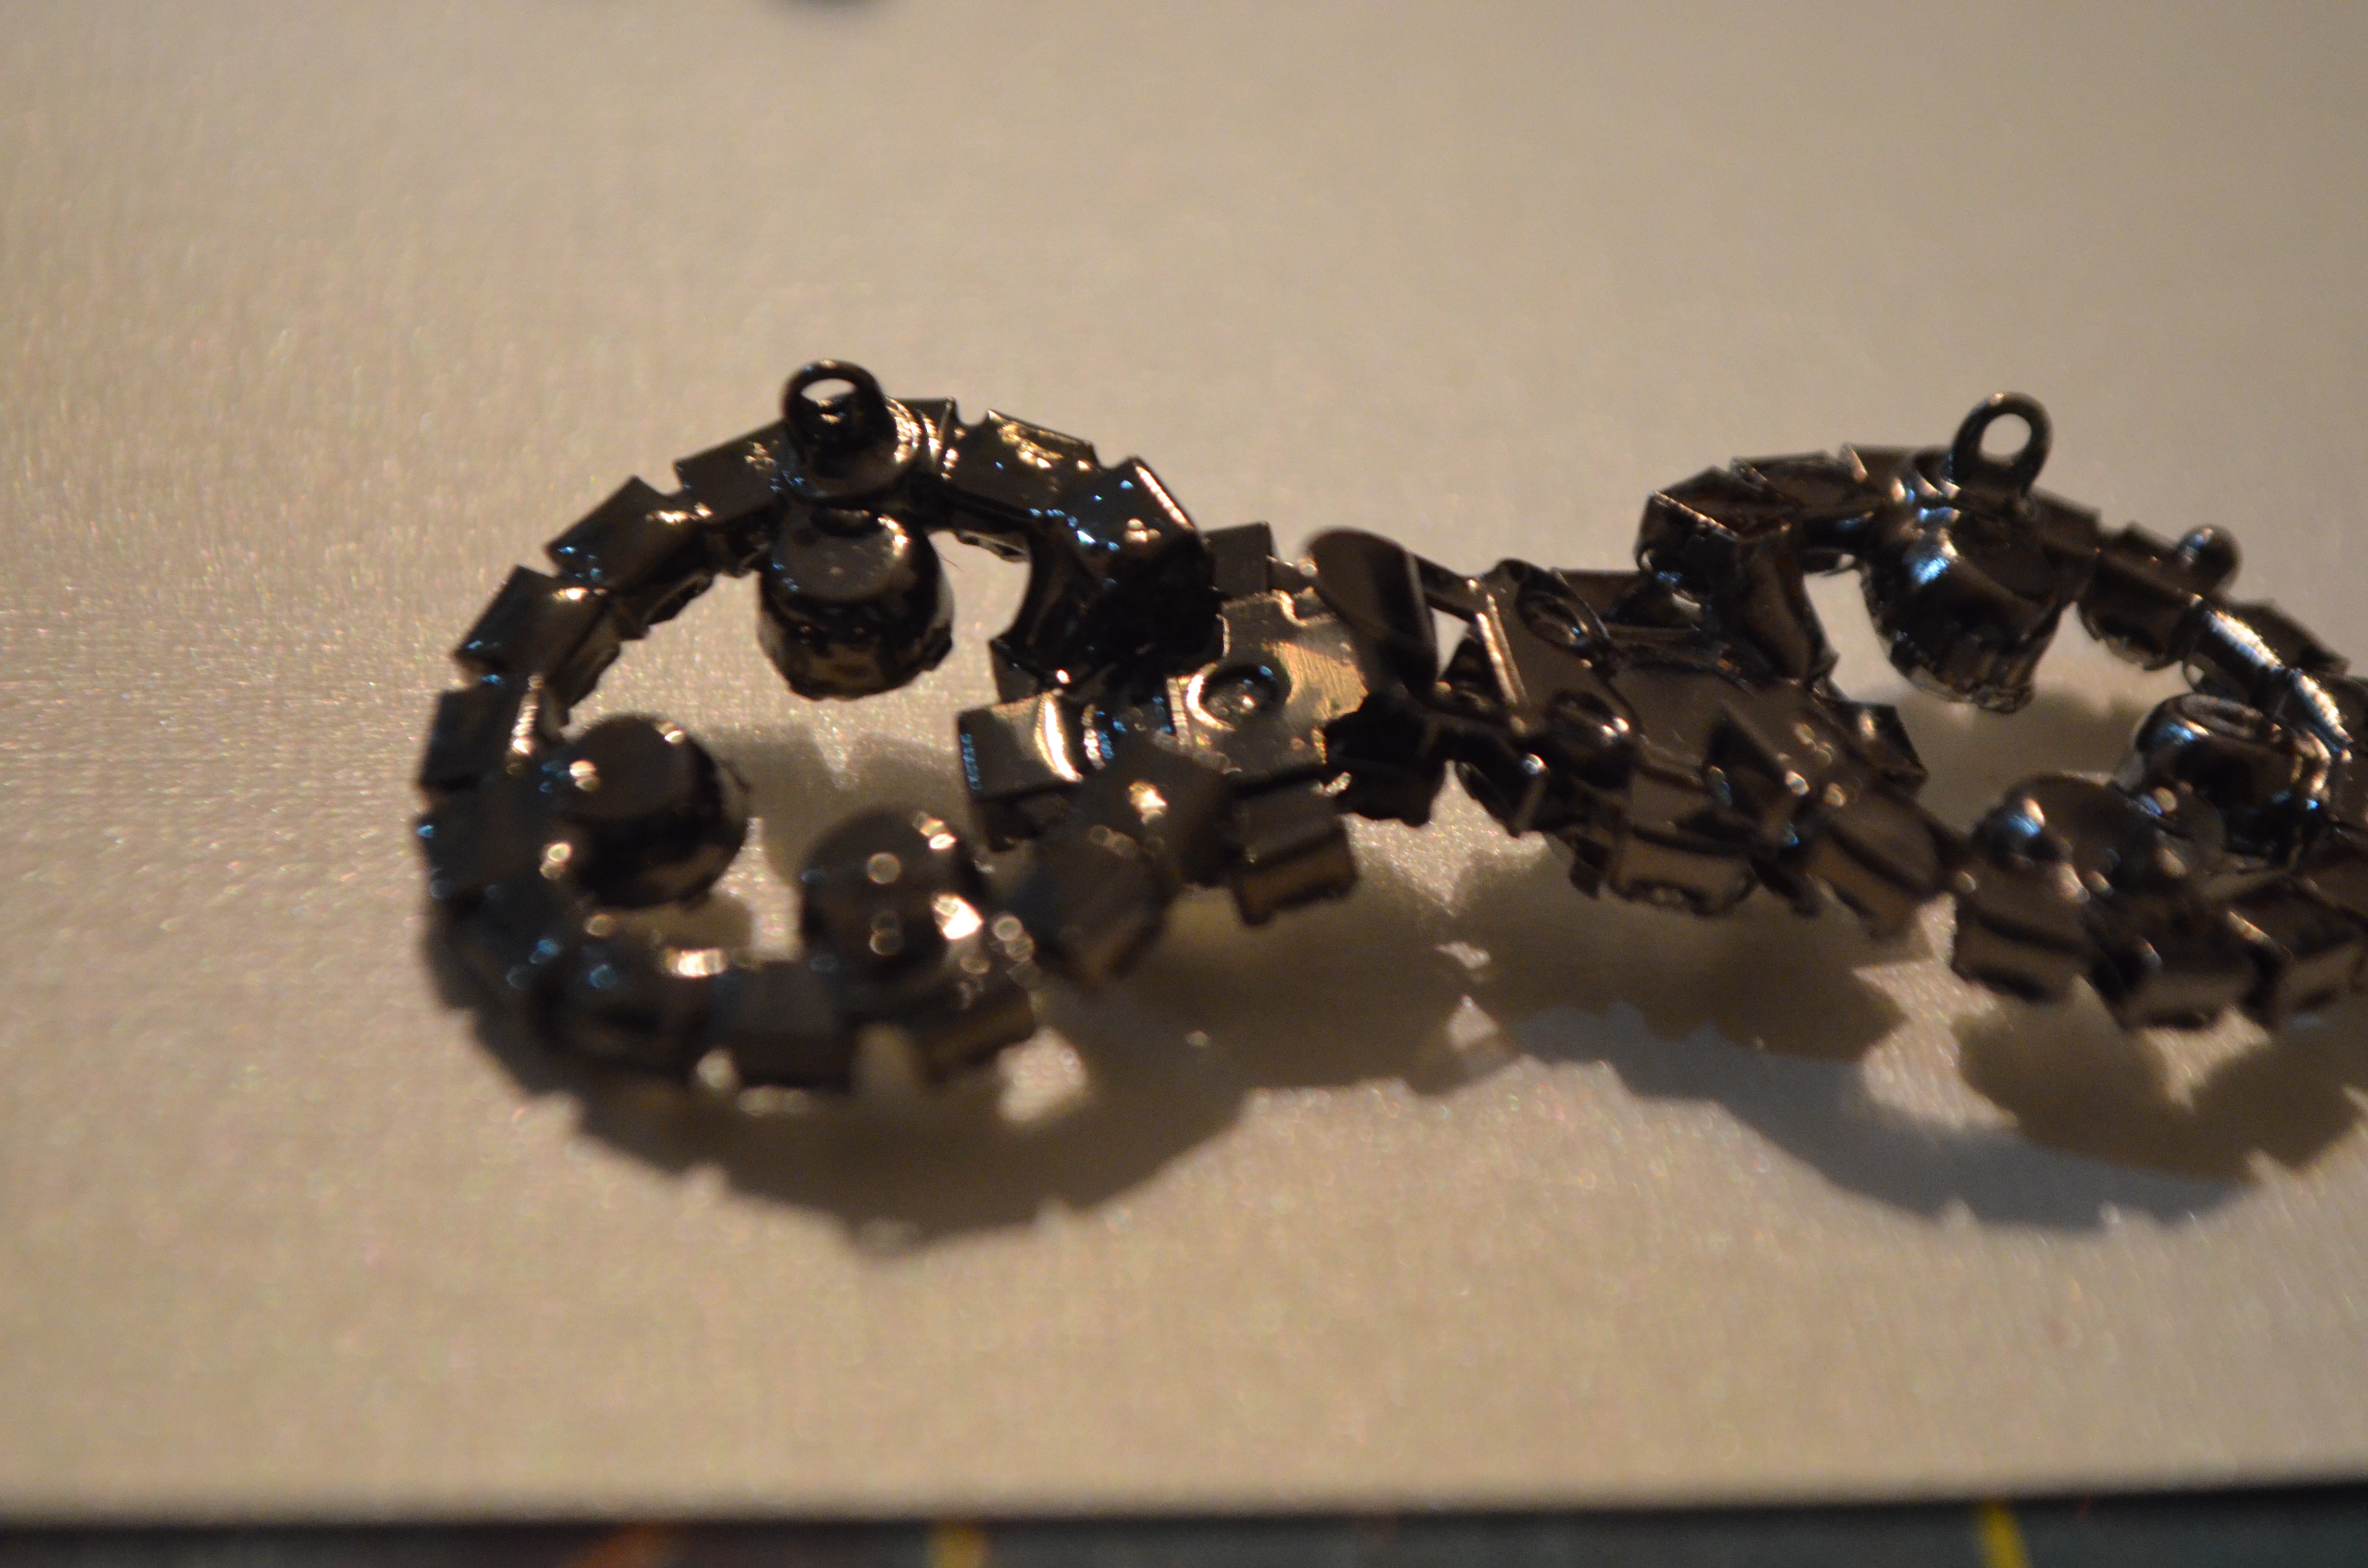
Step 13: Glue your buckles.
I suggest buying some buckles that do NOT have a tricky hook to work with. Mine did, because I did not know any better. They were a pain in the butt because unless they were perfectly lined up and spaced out, trying to pry them open could result in them coming unglued. Ugh.
I suggest gluing the buckles closed, but pulling them apart to have them be well spaced. The way I went about it is that I pressed them really hard on the ribbon to leave indents, and put tiny dabs of E700 in the indents and on the buckle itself. E700 requires waiting a bit for the glue to dry before actually sticking things together. I did the step above for 4or 5 folios, and then went back to the first one and actually glued the buckles to the folios. Worked like a charm.
I then left them alone to dry for over 24 hours (the best would be at least 2 days, for the glue to cure really well.)


Step 14: Add your inserts.
Mine consisted of RSVPs, RSVP envelopes, Venue directions and Flight Recommendations.
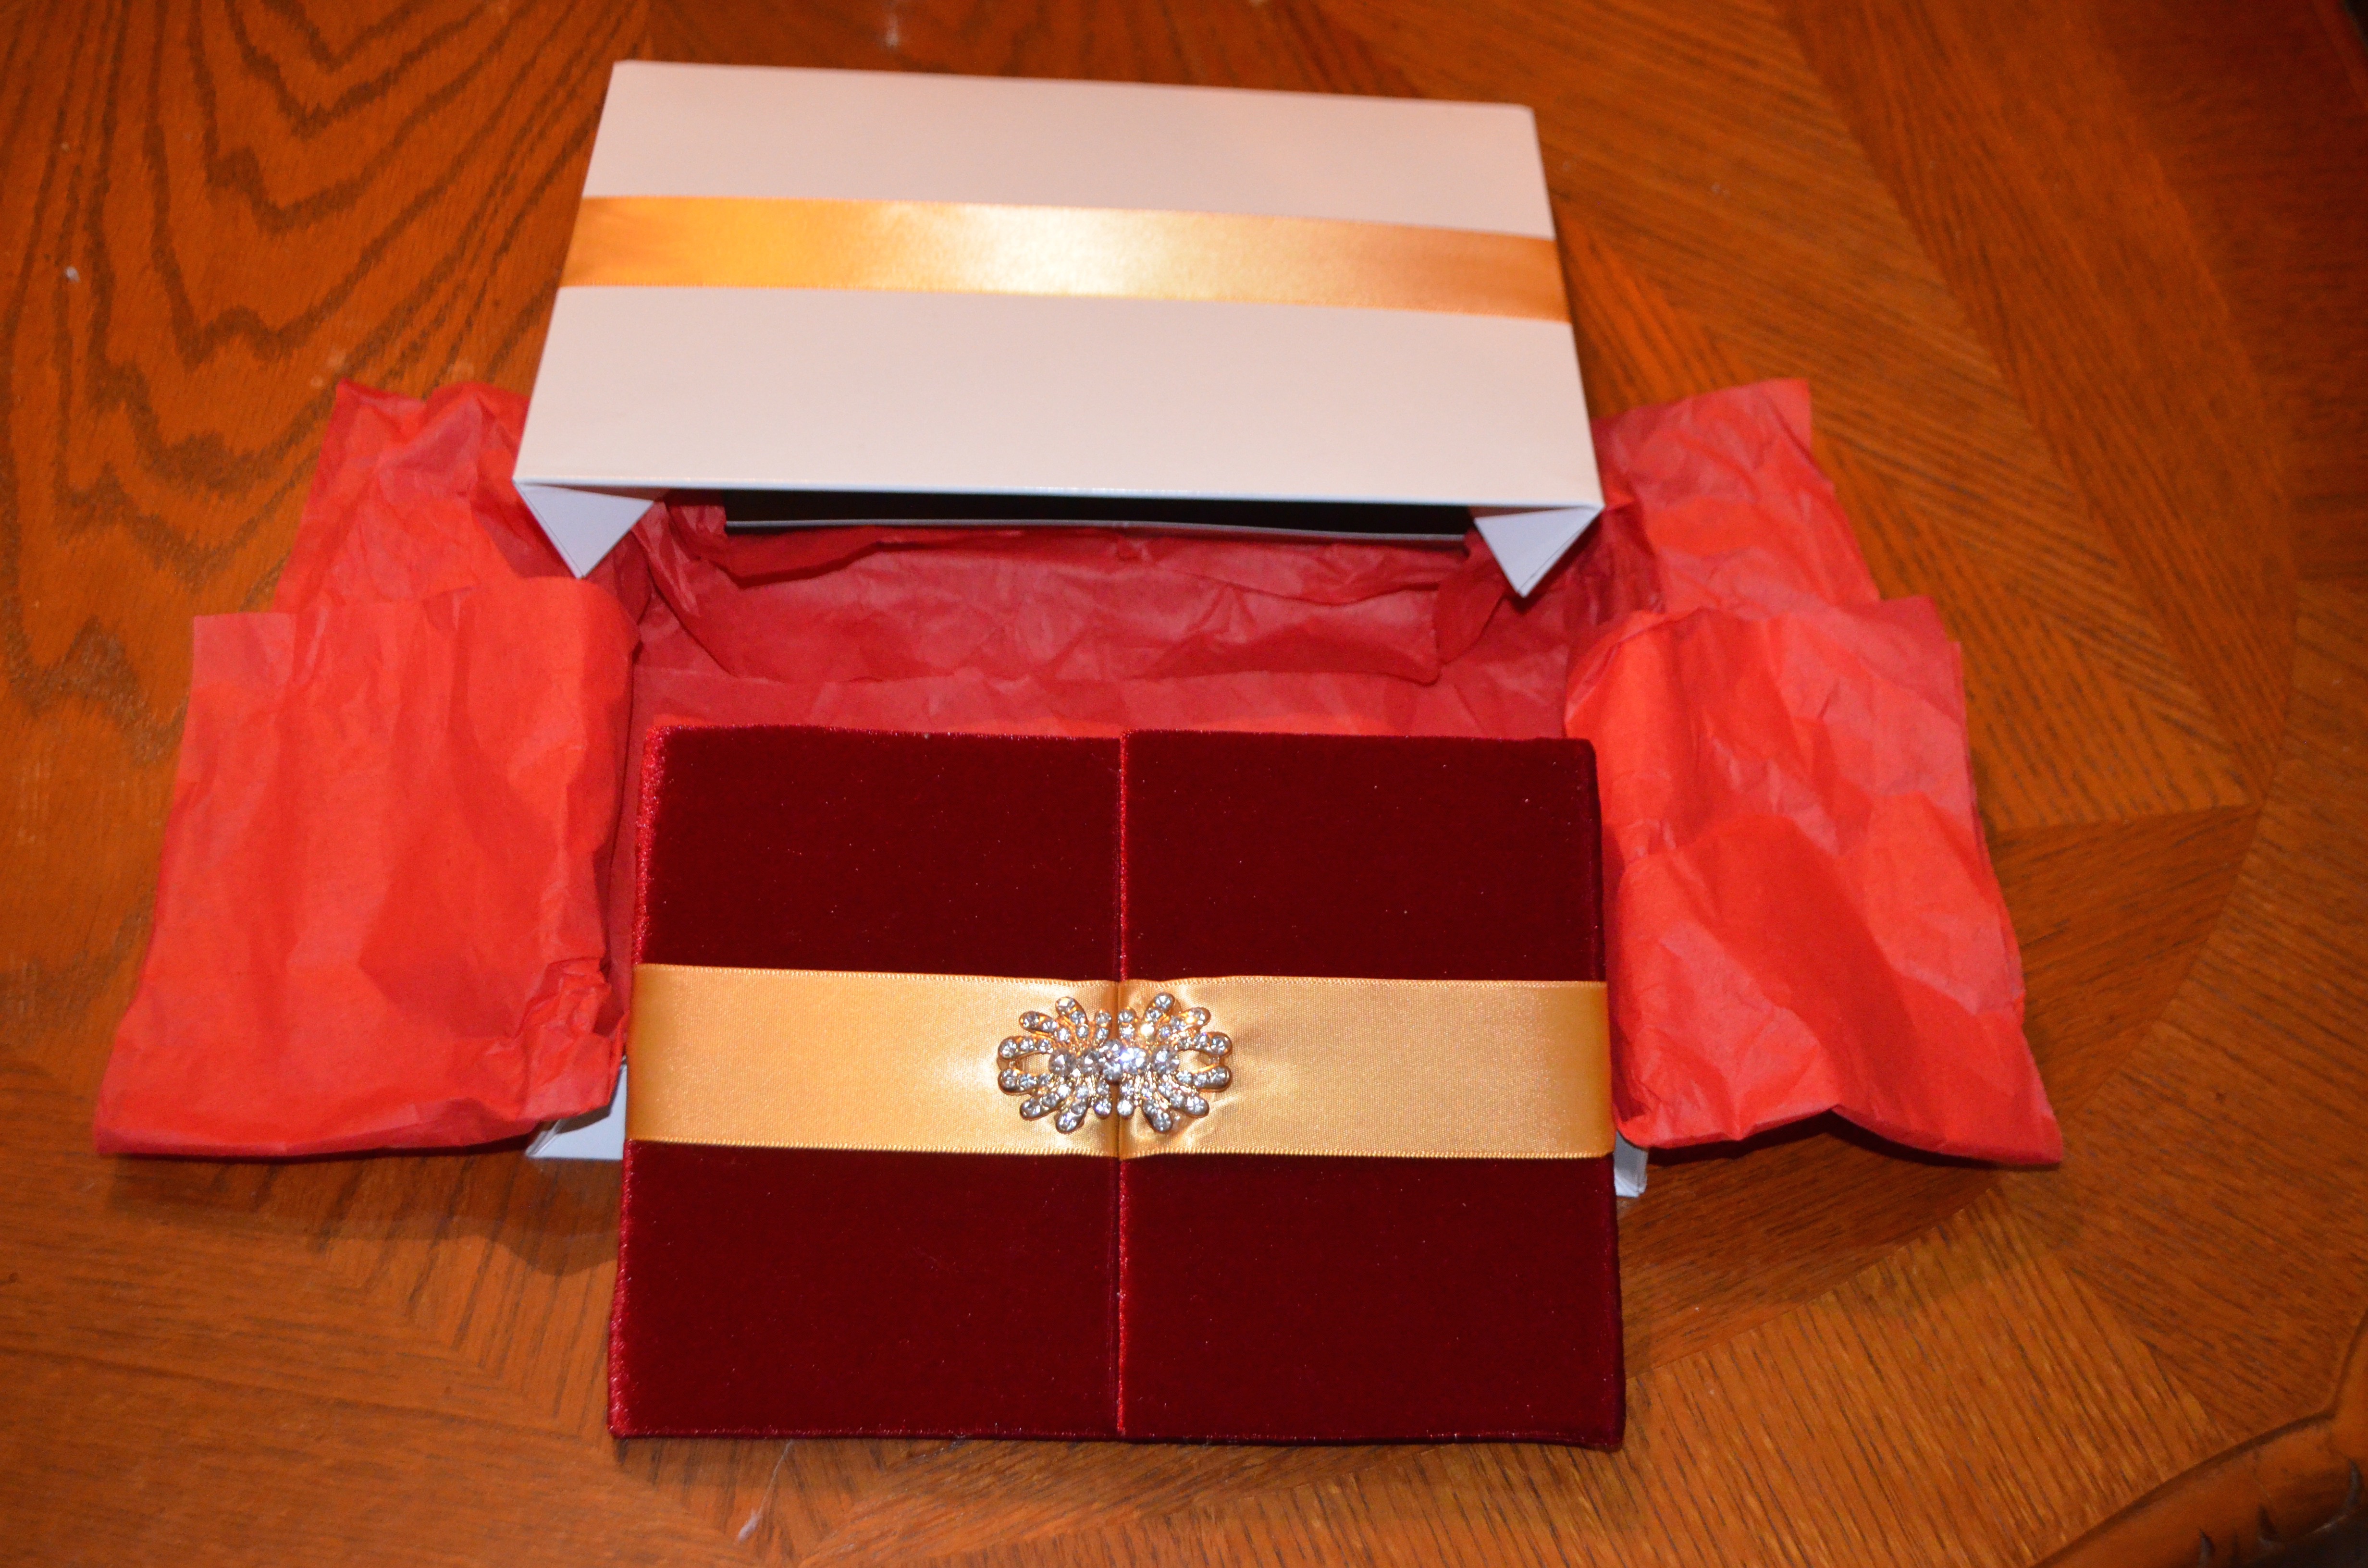
Step 15: Put in boxes.
I stuffed my boxes with red tissue paper, and put my folios in the middle. I also put ribbon across the lid of the boxes (same one as folio ribbon).
Step 16: Address the boxes, and go spend a fortune in postage at the post office 🙂
Seriously. They cost me like $3.50 a pop.
Step 17: Grab a seat and a glass of wine. Pat yourself on the back. Good job.
I guess I have a thing for wine. But seriously, if you made it that far, kudos.
Final remarks:
- The 6inx8in size really does not work for envelopes. Sooooo, keep that in mind.
- This is a very fun activity if you have friends to help. I actually flew over to one of my bridesmaids’, and brought a ton of supplies. We had a super fun crafty weekend, with lots of food, laughter, music, and more friends. It was awesome. Just realize that some of your friends can’t cut anything to save their lives, and some have no idea how to line up anything. Be patient, and have fun.
- Obviously, this is not something to do if you do not like crafts.
- After all was said and done, those bad boys cost me around $8.50 a pop (that is also because I have a ton of stuff left over; I will likely be able to make matching place cards and programs with it.) That is less than half of how much they cost on average. Not bad.
Let me know if you are as crazy as I am, and decide to attempt this. I am also available to answer any questions.
TTYL,
CraftyDafra

Wow, these invitations are beautiful! Looks as though you got them done at a shop, great job! 😀
xx, https://misscaly.wordpress.com
LikeLiked by 1 person
Thanks so much! It was a lot of trial and error, but I finally got it at some point!
Love your blog!
LikeLike
Dafra!! Hey Girl, these invitations are fabulous! I might do this if I get engaged. 🙂 oooh, that is alot of work though. lol. Great job.
LikeLiked by 1 person
Thanks Tasha! Yep they are A LOT of work, but I enjoy crafts so I had a blast making them. Thanks so much for stopping by and commenting!
LikeLike
Hi, I’m going to try these out on the weekend.*my fingers are crossed. I’ve been searching all week for a decent tutorial, I had given up and was going to play around with until i found a way to do it. But omg You did all for me…… yours are the besttttt YAY THANK YOU! I finally don’t have a headache anymore. Only question I have is what do you suggest in size so that they can fit in envelopes.
LikeLiked by 1 person
That is actually something I cannot answer. BUT- I would say look at envelopes large enough, and revere work from that (maybe head to Office Depot or Staples, and look at envelopes you think would work?)
My only advice: keep in mind that the smaller your cards are, the more annoying it will be to work with them. Don’t make them huge, but don’t also make them fit in a regular size envelope (I doubt that’s even possible lol)
LikeLike